When you make a purchase through links on this post, we may earn a commission through Amazon or other retailers. Learn more about our affiliate disclaimer.
Trying to figure out how to improve basketball shooting mechanics? This is one of the most effective ways to become a bigger threat on the court. A jump in accuracy is likely to translate directly to an increase in scoring, making you more effective on the court and making the game more enjoyable all around.
But refining your shot is no simple task. While initial adjustments to your shot mechanics can be dramatically helpful and crazy satisfying, progress slows quickly as you’re forced to chase increasingly subtle adjustments and run through repetitive drills to nudge your percentage further upwards.
If you’re looking to become an elite shooter, you’ll eventually need an experienced shooting coach. This is not really what this post is about. I’m really more interested in the path from bad to decent. So if you just need to explore some of the common tweaks that are going to get you on the trail of sustained improvement, you’re in the right place.
So let’s dig into the tools, tricks and resources that are going to help you uncover your perfect basketball shot.
Of course, shooting is just one element of developing your game. For a broader view, don’t forget to check out my overall guide to improving at basketball.
Traditional Basketball Shooting Tips
These are some of the more common tips I’ve seen thrown around online. I wouldn’t take any of these too seriously. But it can be valuable to experiment with these tricks as an exercise in exploring what works and doesn’t work for you. Think of them not as unbreakable laws, but as tools to help reveal your perfect shot.
We’ll explore these more deeply in the next section, but a quick summary is valuable and seemingly warranted. And I won’t fault you too much if you stop with that. Just make sure to come back for the rest when you start to plateau in your shooting development.
- Your elbow should be just above eye level at release – This is probably the most common shooting tip out there. Personally, it’s also the most helpful tip I’ve ever received. It’s a simple guideline that encourages a good release point and the beautiful arc that comes with it.
- Place your fingers on the seams – Maybe a little obvious. Placing the pads of your shooting fingers on the seam sets you up for traction on that last little flick of the fingers. We can go on all day about where your hands go and which fingers to use, but that seam is undeniably useful. And either way, hand placement is pretty crucial to working out shot consistency.
- Grab the Cookie – This is also sometimes referenced as a swan or gooseneck. The end of your shot should be a relatively straight arm, elbow around eye level, with your hand bent at the wrist like you’re trying to reach a cookie out of a cookie jar above your head. This final position points to that clutch final movement that is the heart of a good shot. So much happens in that final flick that, rather than get lost in the complexity, we often just point to the after effect. You’ve caught the rim of the seam and flicked those fingers out just right to send that ball spinning in perfect alignment. But it ends in this gooseneck.
- Aim for the center of the hoop – Aiming is hotly debated as well. I tend to favor the center of the hoop, but that makes aiming a bit of a conceptual experience. Some players prefer to have a more tangible and visible target. Wherever you aim, the practice is what matters. Placing your attention on a point, a point where you intend to send the ball.
Introduction to Basketball Shot Mechanics
It’s very difficult to describe subtle physical movements. A great shooter makes the act of shooting a basketball look magnificently fluid. But there’s a lot going on here. It’s not something that translates easily to words.
And so we need to supplement with different types of information. Watching video will help you understand what the motion should look like. Diagrams will help you understand angles and concepts. Anecdotes will punctuate lessons.
But let’s at least try for a description, covering each of the fundamental concepts of basketball shooting. Some of this might seem confusing, but it will become clearer the more shots you put up and videos you watch.
Foot Position
Feet are typically at around shoulder width, directly under the body. The dominant side is often shifted slightly forward. That is, the side of the body you shoot with will be angled towards the basket, with the feet pointed slightly to your weak side.
Watching Kevin Durant hit free throws is a great example of this. He’s an elite shooter, and his foot placement can be dramatic.
The Dip
Some of the best basketball shooters alive are staunch advocates for a slight dip post-catch before launching into their shot. and this is somewhat contentious because some coaches see this as a waste of time.
If we’re in a clutch situation where getting a shot off before a defender is able to close out is going to make all the difference, the dip just seems silly.
But indeed it is not. An interesting study out of University of Manitoba, Winnipeg Department of Kinesiology suggests that this technique can translate to a near 10% accuracy boost.
And maybe that looks a little less impressive when you’re under heavy pressure on the court. But the elite of the elite will dip off the catch, and I tend to think we might as well just trust Stephen curry on his basketball shooting choices.
Set Point
When the ball is lifted onto that arm catapult, there’s a point where it pauses, right before launch. This is often referred to as the ‘set point’.
Hand Position
This is an element of traditional basketball shooting instruction that bugs me. Coaches will often tell a player that their hand needs to be set up and positioned in a very specific spot. And somehow it doesn’t seem to factor in that humans have very different hands.
It’s commonly coached to maintain a small pocket of air between the palm and the ball when you’re setting up your shot. This perches the ball on your cupped hand and splayed fingers. This guidance also is flatly ignored by some of the greatest shooters in history who favor shooting from right off the palm.
Don’t follow any specific advice too closely. For example, if you are told to release with a specific finger or combination of fingers, simply take this to mean that the fingers you favor in your release are important. Experiment and figure out which fingers work for you.
Kobe had a few hand injuries in his career. He’s kinda known for it. Not ideal for someone who earns a living off of the subtle action of a digit. It was bad enough (or at least annoying enough) at one point that he shifted from his index to his middle finger as his dominant shooting finger.
That’s not to say that either is better, just that for one of the greatest players of all time, it didn’t really matter. Yeah, you’re not Kobe, but I don’t think that this is a case of passing on some magic secret that applies to everyone. It’s more a case of pointing to a detail that, when actively managed, will bring consistency to your shot and your game.
Carve out that consistency, then make the subtle adjustments to deliver improvement. Which brings us to…
Refining your Basketball Shooting
Your Arc
Without arcing the ball, it’s not going in. Just look at the geometry…
A hoop is placed parallel to the ground. It is 10 feet in the air. Even if you’re Tacko Fall, you’re never really shooting down towards the basket.
This means that in order to score, the ball must always travel upwards before it travels down. This is one of the most magical elements of the game of basketball. This is not simple target practice. There are extreme trajectories involved.
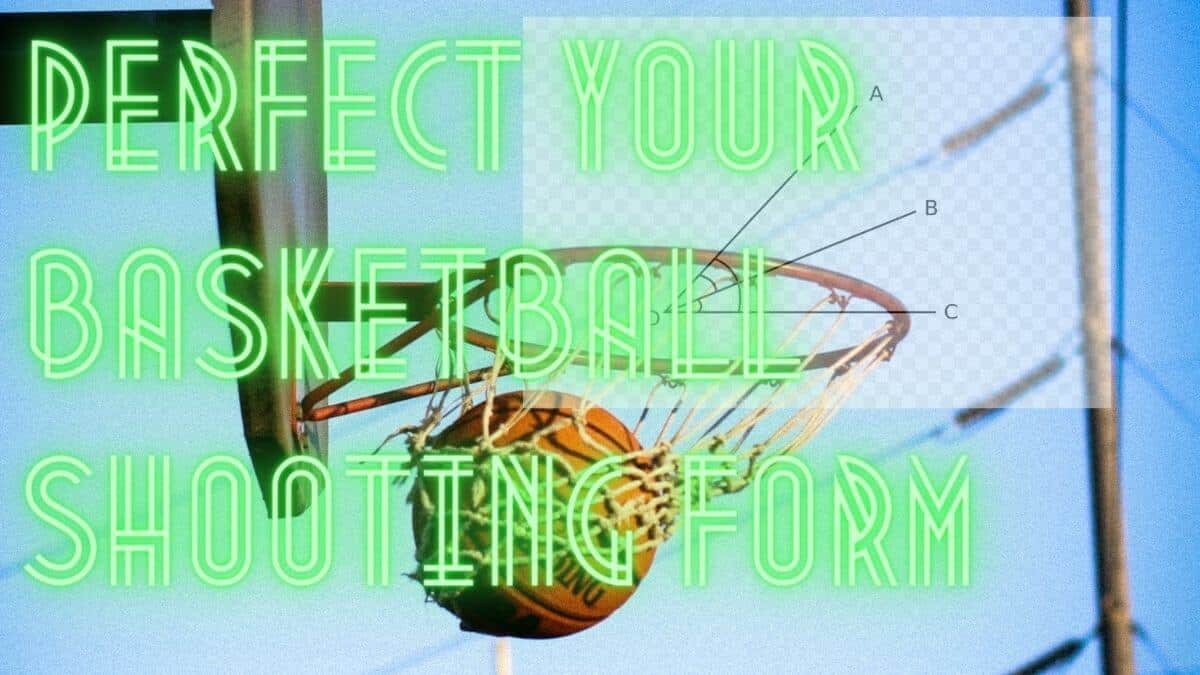
And to a certain limit, a more extreme arc is going to increase the size of your target. In fact, the greater the angle at which the ball approaches the hoop, the larger the target becomes. That can seem a little confusing for a moment, so let’s go to the drawing board.

I’ve drawn a rough trajectory in red for each of the two balls. The blue line is perpendicular to that trajectory and it demonstrates the width of the respective window that each ball needs to pass through in order to enter the hoop.
Hopefully this makes it a little easier to visualize just how much more room for error there is when the angle of approach is increased. A more dramatic arc on your shot means you will be aiming for a much larger target.
Aiming your Basketball Shot
Aiming is one of the most widely debated topics. It makes sense because there’s just so much to think about. My personal take on this subject is pure logic.
Aim for the goal.
You want the ball to go right down the center of the net, right? Aim for that. Some will argue that if you aim for the back of the rim, or the front of the rim, or the ‘diamond tip’ (where the large diamonds switch to small diamonds at the back of regulation basketball nets) or any number of other random locations on the goal, that somehow this will trick you into hitting the net.
That’s cool if it works for you. I’ve actually had a lot of luck with aiming for the diamond, personally. But why would you aim for anything but the actual spot where you want the ball? And it’s good enough for Steph.
Aiming can involve both a mental and physical act. Your mental aim is your active focus on a position related to the goal. Your physical aim is connected to that through every element of your body positioning.
How are your feet set in relation to your chosen aim point? Are your shoulders perpendicular to it? Is your shooting elbow pointing directly at it? Keep your body in line as you extend your body into shot form, ultimately ending in that last moment when a flick of the finger directly at the target sends the ball into a perfectly aligned backspin.
Experiment and find what works for you. If nothing else, the act of aiming can contribute to a focus and mind-body connection that should serve you well regardless. The end goal is that your mind is clear and you’re not actively thinking about aiming but aiming and shooting reflexively.
Repetition
All of the good advice in the world isn’t going to make much difference if you never put it in action. Once you’ve got your shot mechanics broadly in order, repetition is the key to committing it to muscle memory.
Let yourself become obsessive. Setup shop on that free throw line. Grind away at it. Count your shots and keep adding on. Count your misses and keep taking away.
As the free throw becomes routine, move around the floor, from right under the basket to way out in Dame territory. Just shoot and shoot and shoot some more. If you get those reps in, so long as you’ve got the correct alignment, you will improve.
But we’re going to go one better. Start digging into the firearms world, particularly bow hunting, and you find some folks who have made shot accuracy their religion. I’m not going to do a great job of summarizing, but you can start your digging here.
The gist is, our bodies will hijack our shots. Line everything up perfectly, run through your motion, and at the very end, your autopilot grabs the wheel. But that’s not what we want. We’re looking for a perfect system, setting up your body mechanics and executing without variance.
To begin to manage this, you have to create an intricate shot progression. Force yourself to engage deeply with your actions. Label each step, sink into the feel and the detail of every motion right up to the moment the ball leaves your finger tips. Step through the same progression over and over, correcting your mistakes and acknowledging when those mistakes result in a missed shot.
As you work, you will find that your shot progressions will become increasingly detailed. You will begin to notice that when you fail to hit certain steps correctly, your shot goes awry. This is absolute gold. Now you can begin to grind away on the details of the perfect shot.
My shot is not perfect, by any means, but I’ll try and lay it out as an example of what you can start working towards. Your shot should be unique to you, and certainly different from mine. Add and remove the details over time that work for you.
- Catch – Receive the ball and immediately work on getting it into shooting position. Square the shoulders to the basket.
- Match – Find the alignment to initiate a shot. For me this means finding a seam with my middle finger and thumb, and moving the ball into my shot pocket.
- Dip – As I find my pocket, I dip my hips.
- Rise – Now my whole body is going up. Guide hand strong, thumb and pinky stretched, supporting the ball. Purely vertical ball movement.
- Aim – Focus placed on the point at the planar center of the hoop.
- Bend – As the arm straightens out, forward ball movement begins and the shooting fingers take over from the thumb and pinky.
- Snap – The key moment. A flick of the wrist and the ball leaves the fingertips. I drop my guide hand to my inner elbow. This last one is a unique movement that I don’t recommend, but it works for me.
- Evaluation – Hold it for as long as possible for a final check-in. Is my hand in the cookie jar? Is the jar centered under the rim? Where did the ball end up?
Analysis
It’s advisable to install some form of self-analysis in your practice. You can launch shots all day but you’re not going to improve much if you don’t know what you’re doing wrong.
When you miss a shot, give yourself a moment to evaluate. Why did you miss? Did your form break? Did the ball go left, right, short or long? Exploring these questions can lead you to the flaws in your mechanics that are dragging you down and push you towards the consistency you’re looking for.
Once in awhile, take notes. I will occasionally write down a list of positions in my phone or on a sheet of paper and write my makes and misses beside each position. Over time this can reveal patterns and push you to make improvements.
Study the Masters
Crush through video of your favorite shooters. They’re all different, but you can find details in every shot that you can experiment with. Eventually you’ll add these all together into your perfect shot.
For instance, take a good look at Damian Lillard and you’ll see he has a very unique palm shot. His fingertips don’t engage until the final flick. This won’t work for everyone, but for the right person, it’s key. That palm can give you a firm base and some length to flip those fingertips in.
Drills
Shooting drills are perhaps most valuable as a key to repetition. By running drills, you wrap up sets of shots in a nice package to provide organization and sense of accomplishment in your shooting practice. Here are some very simple and easily reproducible shooting drills.
- Free Throws – Attempt 10 free throws and take a mental note of how many makes you’ve got. Add a 0 and that’s your free throw percentage. Try to beat your record. If you can make 10 easy, maybe go to 20. I’m not there yet unfortunately.
- Around the World – Set some points around the key and hit 3 attempts from each spot. I like to hit all 4 corners of the key and the halfway points between them, skipping under the basket. That’s 21 shots. Add some more points around the arc for your distance practice if you like. But I don’t really recommend wasting time on shots you wouldn’t take in a game, personally.
- Bare Shooting Form – It’s not at all silly to practice your shot without worrying about the hoop. Getting shot reps in with a deep focus on technique is vastly beneficial.
- Close Shots – It’s also fine to get right under the basket for some reps. Shooting from close range with a focus on perfecting your arc can be remarkably beneficial to your shot.
- One-Handed Shooting – Shooting with one hand can help reinforce proper balance and alignment. When that guide hand comes back, it’s just a little added support.
Tools to Improve Basketball Shooting
The Siq Basketball
Smart basketballs are a thing now. Kinda…
There was a moment there where there were several different brands of basketball promising varying degrees of onboard analytics. And it’s always tough to sort out the difference between marketing and reality with products like this.
But at this point, the Siq basketball is really the only option we have left in terms of a shot tracking basketball. And even that is only intermittently available. I break this down in my post about smart basketballs if you’re curious.
It’s a pretty cool product, allowing you to collect your shooting data seamlessly as you shoot around with a FIBA-approved ball. But it does come with a monthly fee.
Shot Analysis Apps
There are also several apps that promise shot tracking from your phone. These can be fun to play around with. I struggle with them a little myself, just because I don’t like the overhead of setting up a device to record my play. It’s certainly worth it on occasion, but can be invasive. If you’re interested, check out the HomeCourt app.
Training Basketballs
There are also various basketballs that have been expressly designed to aid in training. In terms of shot training, you’ve got 2 common styles.
Hand Placement Basketballs
Hand placement basketballs will coach you to place your hands in specific positions on the ball when shooting. These can be helpful for young players, but I haven’t found them very helpful personally.
Rotation Training Basketballs
Rotation training balls are actually kinda cool. The True Spin basketball is particularly interesting in guiding rotation development. The distinct colors make a good rotation quite obvious. I also feel pretty strongly that focusing some attention on watching and examining the path and movement of the ball after it has left your hands can be very beneficial.
If you’re not into playing with or spending money on a ball that is obviously designed with training in mind, FIBA-style balls can offer some of the same benefits. These Molten balls are high-quality and beautiful.
Other Training Tools to figure out how Improve Basketball Shooting
There are a variety of other devices that are designed to train proper shooting technique. It gets a little out of control.
You can find targets to affix to your net. You can find gloves to reinforce positioning of your guide hand. You can find finger springs to enforce a firm finger snap at the end of your shot. There’s this giant ball that forces you to work on your aim. These devices are kinda entertaining but I wouldn’t recommend getting carried away unless you’re struggling with a specific issue and you see some good reviews.
The only thing I would personally recommend if you have the means is a shot returner. If you can get every shot sent right back to you, you’re going to be able to get off a lot more practice shots without running all over the court. More shots is going to translate to better shooting. I like that logic.
Takeaways
I hope this has helped some of you knock a couple of misses off your personal stat line. I do honestly wish I had something like this as a resource when I first got started. I think it’s a common but not a very glamorous position to be in when you’re just a regular adult human who wants to shoot a basketball more efficiently. But a lot of guides are a little serious for my tastes as someone who loves the game but will never really be competitive in the sport.
Oh, and one last tip. I mentioned it earlier. But go ahead and take some time to watch some shooting instruction on Youtube. It might take some experimenting, but there are some great videos out there and getting solid visuals can really help you make the jump to that next level.
There’s a section in my post about basketball youtube channels that mentions some of the best skill-building channels.
Or, you can also do things like find your favorite player and watch some analysis of their shooting form…
Just remember that you’re probably not a 6′!0″ KD, so your form will be different.
The ShotMechanics channel has a ton of great guides too. This one is very early on, so the production value is a little beat, but the content is still solid.